Azure WebJobs for background processing in App Service

The point of Azure WebJobs is to carry out small background tasks within the context of your Azure App Service. The main advantage is that an Azure WebJob has access to or awareness of your App Service environment (files, logs, processes etc) to do pretty much anything you would like it to. It is one of the many options in Azure to handle associated tasks for your main web application and in actuality, forms the basis of how Azure Functions get triggered and get run (topic for another day maybe!!)
Here, we will take a quick view into how to deploy a Web App on Azure that has an adjacent Azure WebJob from the IDE perspective in Visual Studio. The WebJob will be run on a schedule we define as a CRON expression. We will have a .NET Framework Web Application with an Azure WebJob to write files to the App Service's file system which a user wouldn't typically get access to (you may choose to do a completely different task altogether).
The following guidelines do NOT work for .NET Core Web projects (you will need to add the WebJob from the Azure Portal instead for that)
Web App and Azure WebJob Setup in Visual Studio
We will be assuming you have an ASP.NET Framework Web Project (on .NET Framework 4.7.2) in Visual Studio 2022.

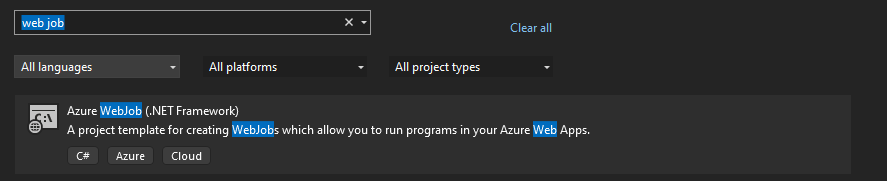
Now add a new Azure WebJob Project to your Solution (on .NET Framework 4.7.2):
After the Azure Webjob is added to the solution, we will be executing the following code for our Azure Webjob in the Functions.cs file:
using Microsoft.Azure.WebJobs;
using System;
using System.IO;

namespace WebJob
{
    public class Functions
    {
        public static void ProcessQueueMessage([QueueTrigger("queue")] string message,
        TextWriter log)
        {
            log.WriteLine(message);

            string webrootPath = Environment.GetEnvironmentVariable("HOME");
            string filePath =
            	Path.GetFullPath(Path.Combine(webrootPath,
                DateTime.Now.ToString("yyyy-MMM-dd HHmmss") + " webjob.txt"));

            Random random = new Random();
            string[] emojis = { "😀", "😍", "😮", "😎", "🤣" };
            string[] descriptions =
            { "Smiling Face", "Heart Eyes", "Shock Face", "Cool Face", "Laughing Face" };
            int randomIndex = random.Next(emojis.Length);
            string selectedEmoji = emojis[randomIndex];
            string emojiDescription = descriptions[randomIndex];
            string newText =
 $"Hello from Azure WebJob - this time it has to be {selectedEmoji} ({emojiDescription})";

            File.WriteAllText(filePath, newText);

            log.WriteLine("File written.");

        }
    }
}
A small program to pick a random emoji and description, concatenating with a string and writing to a destination on the App Service file system
In the Program.cs for the Azure WebJob Project, we will call into the Function like so:
using System;

namespace WebJob
{
    public class Program
    {
        public static void Main()
        {
            Functions.ProcessQueueMessage("Function triggered at " +
             DateTime.Now, Console.Out);
        }
    }
}
Now to make sure that we are able to run the job on a specific schedule, we need to set a CRON expression within a settings.job file within our Azure WebJob project. Add a new json file your Azure WebJob project and then rename it to "settings.job", and add your CRON expression (we will refer to this again shortly):
{
  "schedule" :  "0 * * * * *"
}
A CRON expression to run work every minute
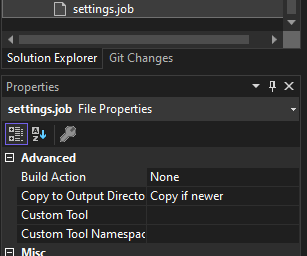
Additionally, set a Build Action to copy out this settings.job file to the output directory from the file's Properties in Visual Studio (Copy if newer):
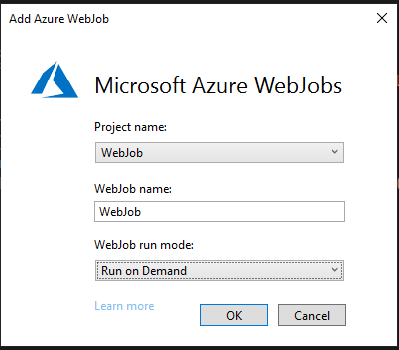
Next, link the WebJob to the your ASP.NET Web Project by right-clicking the Web Project > Add > Existing Project as Azure WebJob:
You will now see that your Web App Project is now aware of your webjob from the newly created WebJobs-list.json file in the Web App Properties folder like so:
{
  "$schema": "http://schemastore.org/schemas/json/webjobs-list.json",
  "WebJobs": [
    {
      "filePath": "../WebJob/WebJob.csproj"
    }
  ]
}
The Azure web job project is now a known WebJob for Azure
Deploy Webapp and WebJob to Azure
We can now deploy the Web app to Azure that has a WebJob already attached.
Right Click on the Web Project, then Publish, Azure, App Service (Windows).
From here, you will need to choose/create your desired App Service Plan tier for Azure App Service in addition to the resource group and region. The Basic tier should be ok.
Once you have configured your deployment Target, click Publish:
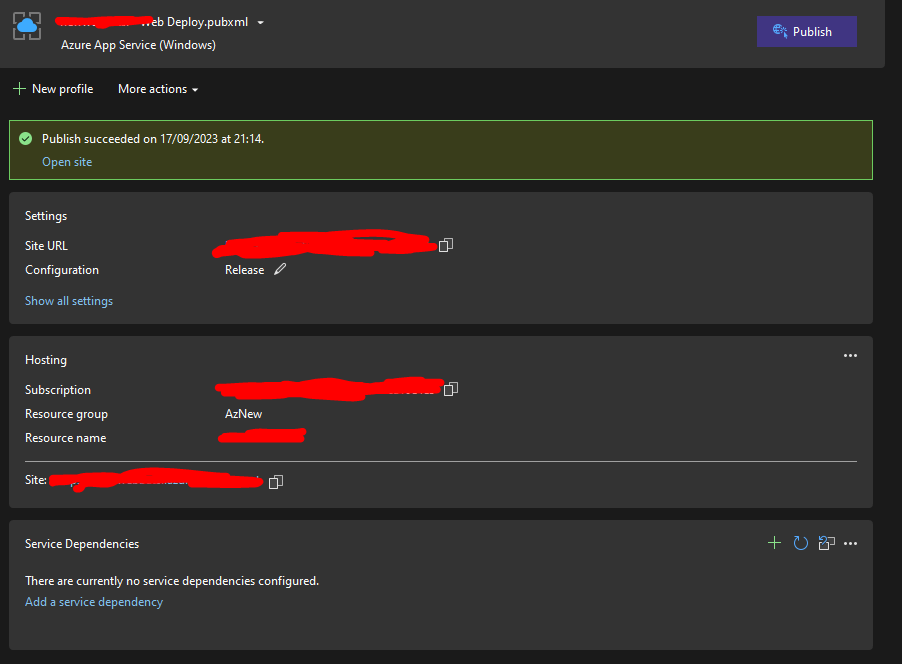
Results
In the Azure App Service in your Azure Portal under WebJobs, you should now see your WebJob with a successful run since this will run on first deployment and then continue running every minute (even when the App Service gets stopped):

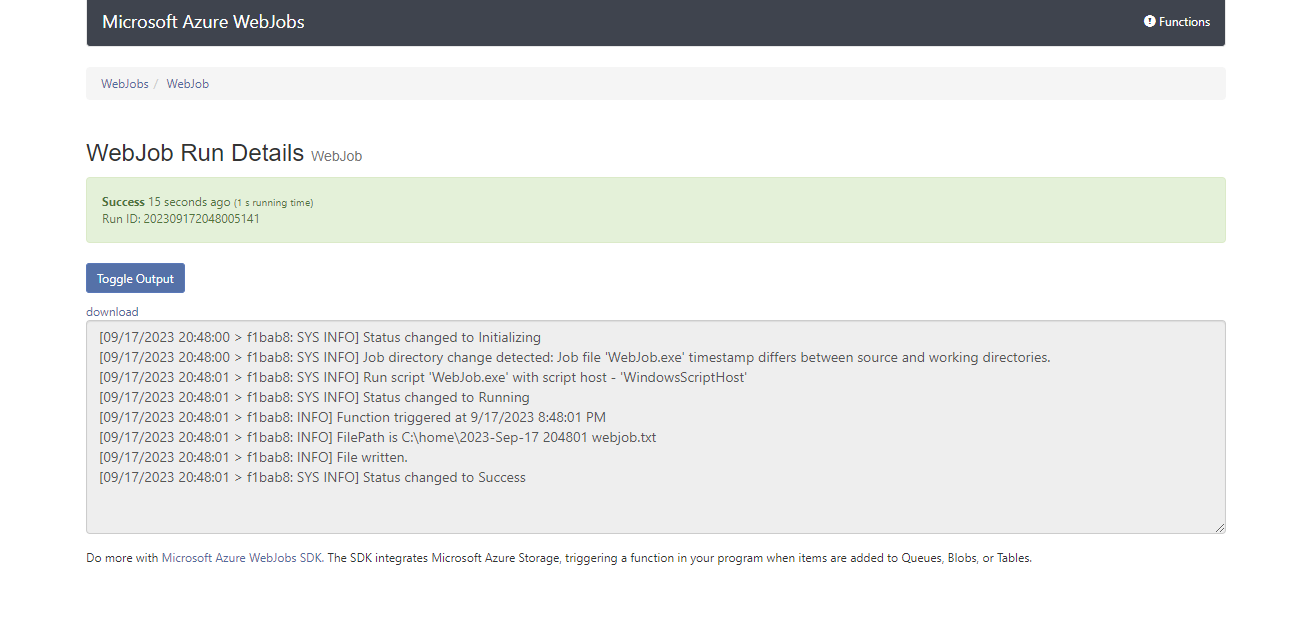
When you observe your web job from the Kudu Tools at either App Service Overview > Advanced Tools > Go > Tools > WebJobs dashboard > [YourWebJob] or directly at https://[yourappservice].scm.azurewebsites.net/azurejobs/#/jobs/triggered/[yourwebjob] , You should see that the job succeeded:
In my case, as evidenced earlier, my WebJob writes a file every minute to the App Service's home directory with a selected emoji:
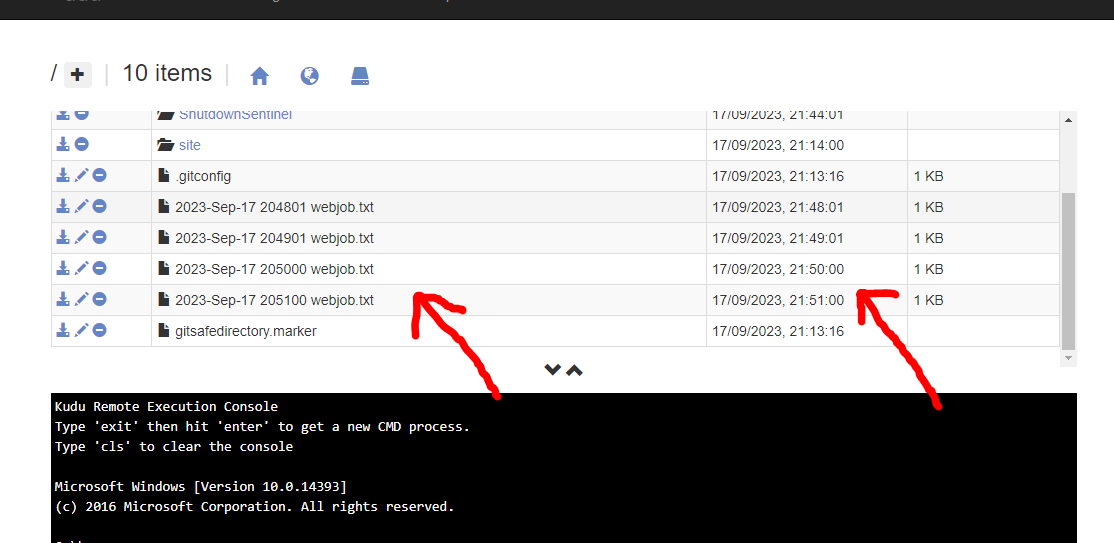
And finally, when we download the .txt files we can see the text written in them as shown below:

When done, Remember to delete the Azure App Service if not needed!!!