Listening to Azure audio blobs on Google Nest Hub

This is a follow-on post to Azure Media Services Clips.
After creating the Function for serving the podcast clips (or any other audio as blobs) from Azure, it gives rise to the opportunity of requesting the stored podcast audio Urls in Azure, from a device like a Google Nest Hub that will play the audio nicely in our home and can enhance the experience with simple buttons (known as Suggestion Chips in Google Assistant terminology) and a touch interface (if we choose). From the Google side, this is possible using Actions on Google and Google Cloud Functions.
The Google Cloud will talk to the Azure Cloud!! When two clouds collide together, electricity is made 🌀⚡!!
A small pre-requisite, this post will assume you have a paying Google Cloud account, or at least the easiest pathway is to sign up for a free 90 day trial at https://cloud.google.com/free
Ok. To start, head over to the Google Actions dashboard at https://console.actions.google.com/ and sign in with your Google account. Then select New Project > Custom, then Blank Project
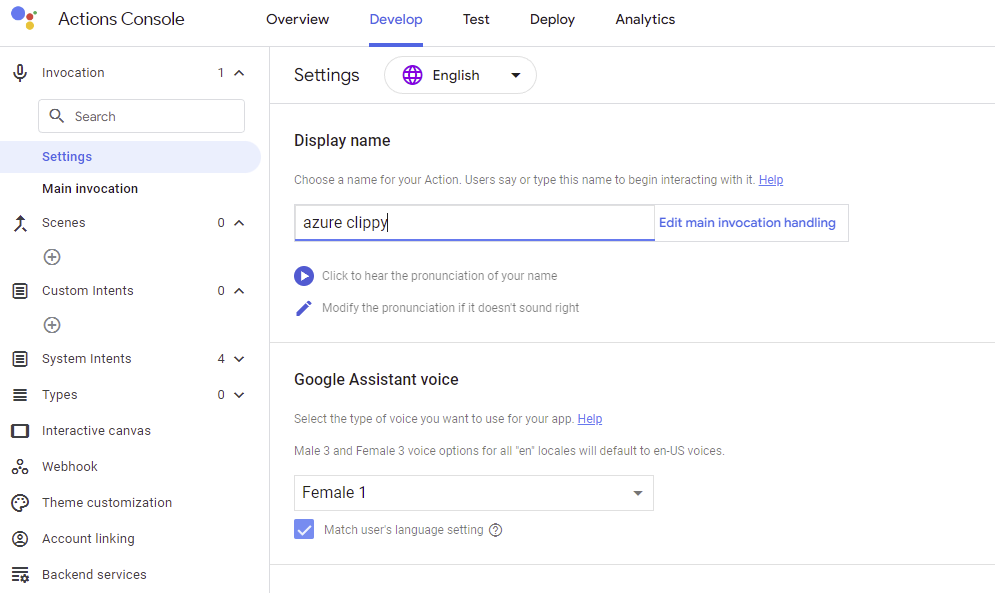
After loading, navigate to the Develop Tab and set a display name and Assistant Voice under Main Invocation > Settings, making sure you press Save afterwards:
In the Invocation > Main invocation screen, add the text 'Welcome, which topics would you like to listen to from this week.' for the speech item:
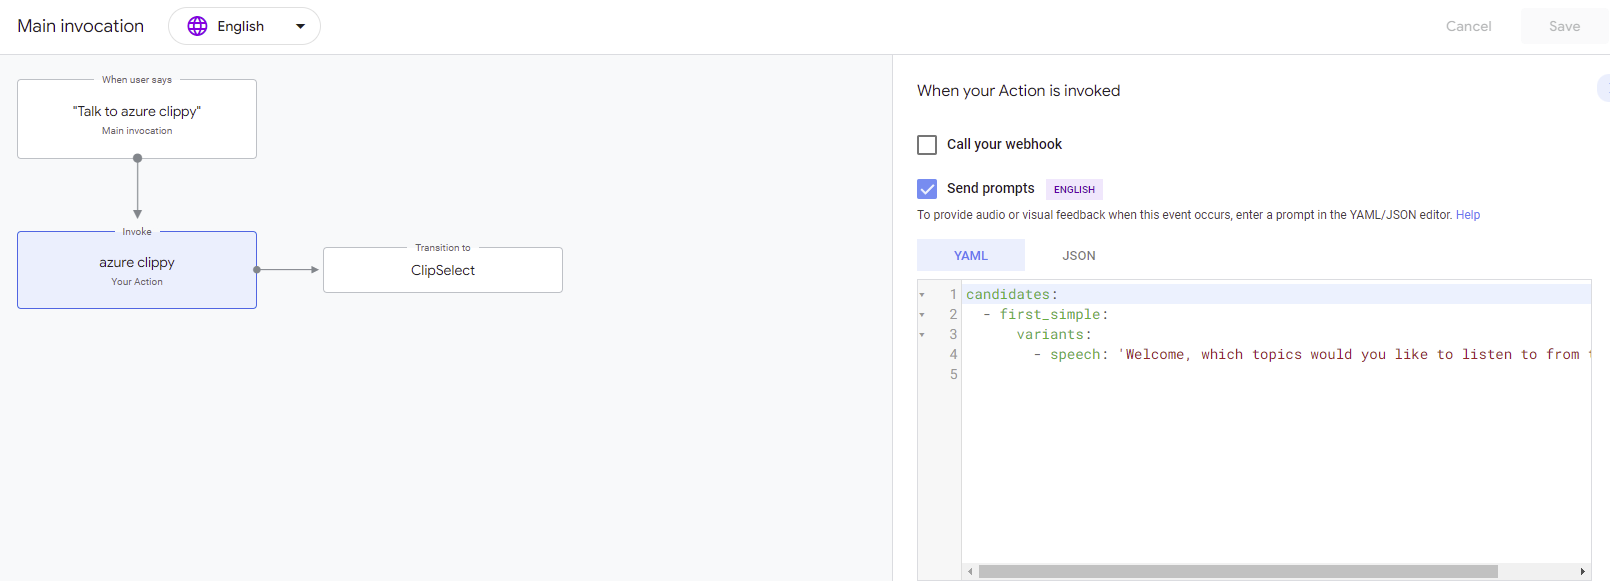
Scroll the page down and Click the dropdown at the bottom right-hand screen titled Transition. In the text box shown underneath, type ClipSelect and click Add:
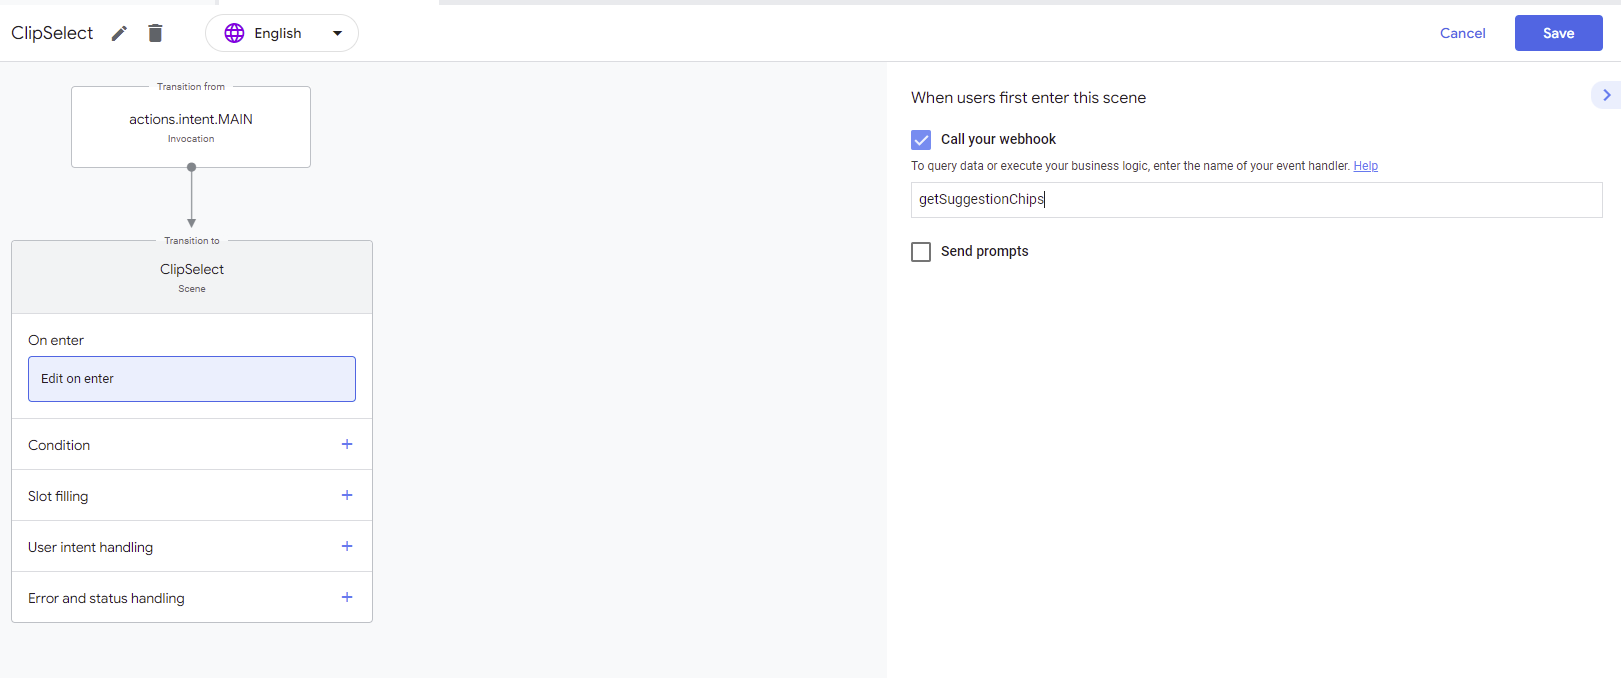
After clicking Add, you should be taken to a Scene page for ClipSelect. In the On Enter section, click the + icon, then on the right hand side, tick Call your webhook, and type getSuggestionChips in the text box and click Save. This will allow a call to a webhook to execute javascript code when the user Invokes the Action:
Set up a webhook to display Suggestion Chips
Next, we need to define what 'getSuggestionChips' will do. We can do this by clicking the Webhook section on the left-hand menu. If this is your first time using this, choose Inline Cloud Functions:
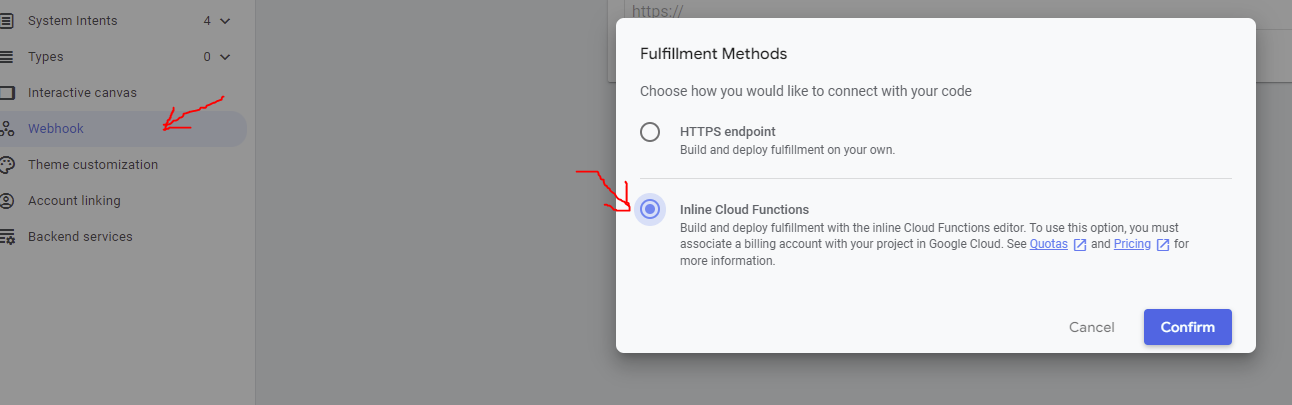
Click Confirm and this should open an Editor for Index.js. Before you start you will need to associate the project with your billing account as instructed. Click Open Cloud Console to Link the project to a billing account and follow the instructions there. This will be your Free trial account or your paying account:
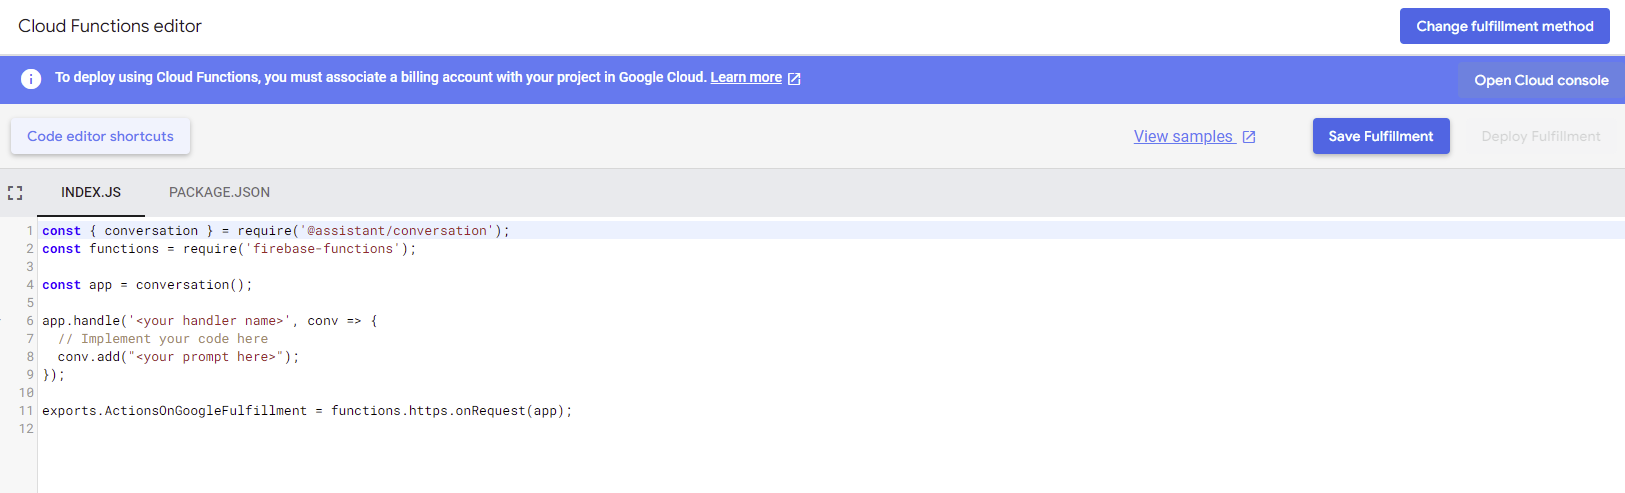
After completing the linking process, return to Webhook > Index.js and now replace all the code in Index.js with the following to define the getSuggestionChips webhook. Make sure to insert your HTTP Triggered Azure Function's Function Url from the previous post:
//libary imports
const { conversation, Media, Image, Suggestion } = require('@assistant/conversation');
const functions = require('firebase-functions');
const https = require('https');

const app = conversation();

app.handle('getSuggestionChips', conv => {

  return new Promise(function (resolve, reject) {

 //Call your HTTP Azure Function
 https.get('YOUR_HTTP_AZURE_FUNCTIONURL', (response) => {
  let data = '';

  //progressively build up the response object
  response.on('data', (chunk) => {
    data += chunk;
  });

  response.on('end', () => {
    resolve();

    let topicsFound = JSON.parse(data);
    for (var i = 0; i < topicsFound.length; i++) {
       //Smart Displays only allow up to 8 suggestion chips
      if(i < 6){
          //ultimately adds 6 Suggestion chips on the welcome screen of our Action
        conv.add(new Suggestion({ title: topicsFound[i].topic }));
      }
  }

    //store the json in session storage for quick access later
    let topicMap = data;
    conv.session.params.topicMap = topicMap;

  });

}).on("error", (err) => {
  console.log("Error: " + err.message);
});

    });

});

exports.ActionsOnGoogleFulfillment = functions.https.onRequest(app);
Click Save Fulfillment and then make sure to click Deploy Fulfillment until this completes. The result of this code is that it will add 6 'Suggestion Chips' or clickable buttons to the Welcome screen that contain our topics that we stored in the Azure Storage Table. In addition to creating the Suggestion Chips, the above code also stores the returned JSON from Azure in Session Storage so that this data can be reused in other places needed, saving the need to call out again to Azure to get the same JSON.
Accept Custom Suggestion chip texts as User utterance (input)
Because of the fact that the text in the Suggestion Chips that we get is not static in this case and changes week to week (in my case, the Azure Function is serving data that can be different depending on the new podcast's topics), we cannot specifically tie each Suggestion chip to an Intent.
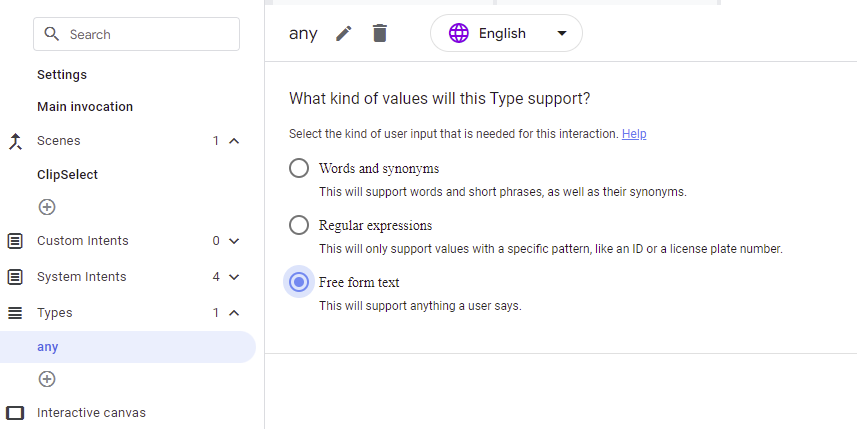
To accept the text from any Suggestion chip chosen, we can create a custom Type that accepts Free form Text. From the left hand menu, expand Types, then type in the word any, press Enter. The panel in the middle should show a radio button selection for the kind of values to be accepted. Choose Free form text and then click Save:
Detecting the User's Suggestion Chip selection
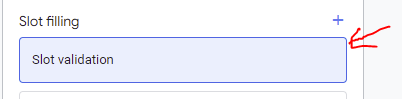
Next, go back into the Scenes > ClipSelect and then add a Slot Filling:
Then click Slot validation:
Next on the right hand side, check 'Call your webhook' and type in selectAudio:
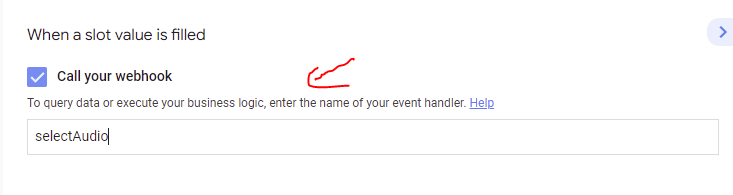
This will allow another webhook event handler to be called when the requirements of the slot are filled (discussed later). We want this webhook to be called when our user selects a Suggestion chip, but in this case the user's input will be 'anything' that the suggestion chips are populated with.
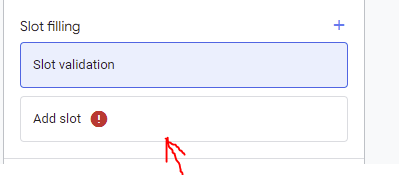
To do this, proceed to click on Add a slot:
On the right hand side, add a Slot Name that follows that 'any' Type created earlier, and call this userChosenChipText. This will mean that the Google Action will look to satisfy a user input that matches free form text (which will fill the slot). Check 'This slot is required' and also notice the session.params.userChosenChipText slot value Writeback (more on this later):
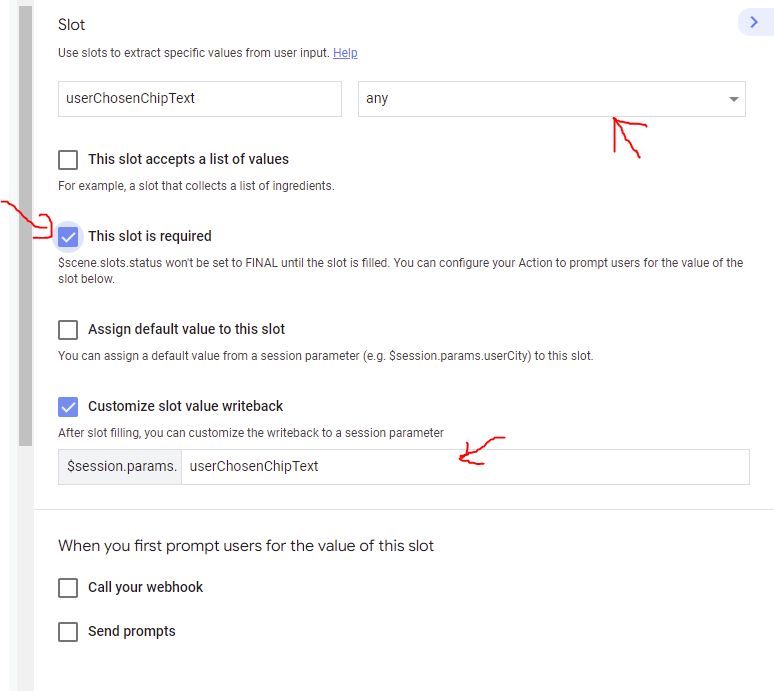
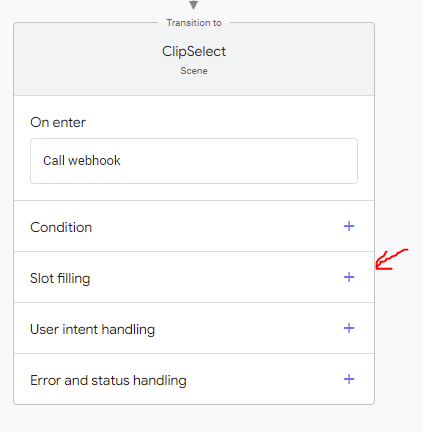
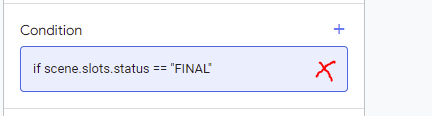
Then finally, delete the Condition on the left side and Save your Scene configuration:
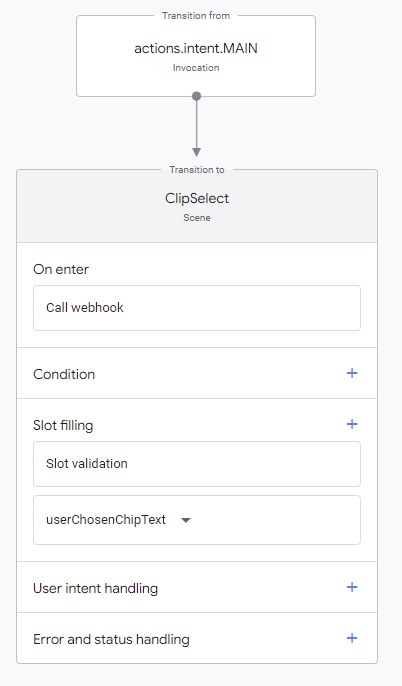
The Scene should look like this at this point:
Next, we have to add the code for handling our newly created selectAudio event handler in the webhook. Go to Webhook > Index.js and add the following:
app.handle('selectAudio', conv => {

  let topicLink = '';

  //retrieve the topics and urls json from session storage,
  //saves us from making another HTTP call
  //to our external endpoint (Azure) again
  let jsonSessionTopicMap = JSON.parse(conv.session.params.topicMap);
  for (var i = 0; i < jsonSessionTopicMap.length; i++) {

    //find what the user selects from the json topic map.
    // userchosenchiptext is what the chip that the user clicks on
    if(jsonSessionTopicMap[i].topic == conv.intent.params.userchosenchiptext.original ){
      topicLink = jsonSessionTopicMap[i].audioLocation;
    }

}

  conv.add("Ok, let's hear the highlights on "+
           conv.intent.params.userchosenchiptext.original );
   conv.add(new Media({
    mediaObjects: [
      {
        name: conv.intent.params.userchosenchiptext.original,
        description: conv.intent.params.userchosenchiptext.original + " highlight Reel",
        url: topicLink,
        image: {
          large: ASSISTANT_LOGO_IMAGE,
        },
      },
    ],
    mediaType: 'AUDIO',
    optionalMediaControls: ['PAUSED', 'STOPPED'],
  }));

});Handling Playback Pauses
Lastly, to handle a pause event when the user clicks pause (and for resuming), navigate to System Intents > Manage System Intents and Enable MEDIA_STATUS_PAUSED and click Save:

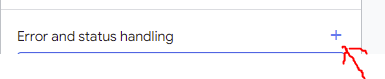
Now go back into the ClipSelect scene to add this Intent as part of status handling. Click Scenes > ClipSelect, scroll down the flow diagram and add an entry for Error and Status handling:
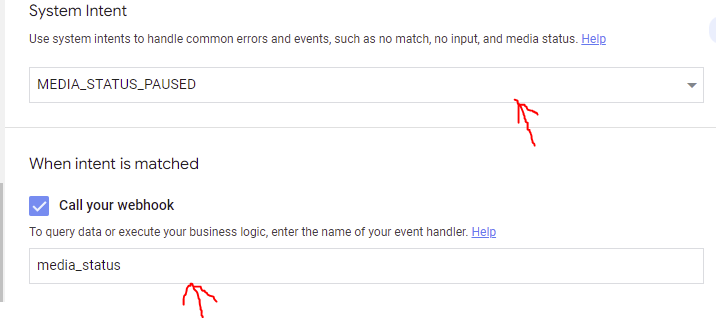
Next on the right hand panel, select the MEDIA_STATUS_PAUSED Intent from the dropdown, check Call your webhook and add the name media_status for the webhook event handler:
Last item.. get back to the Webhook section and add the following event handler in the webhook code (Index.js) as recommended by Google:
app.handle('media_status', (conv) => {
    const mediaStatus = conv.intent.params.MEDIA_STATUS.resolved;
    switch (mediaStatus) {
        case 'FINISHED':
            conv.add('Media has finished playing.');
            break;
        case 'FAILED':
            conv.add('Media has failed.');
            break;
        case 'PAUSED' || 'STOPPED':
            if (conv.request.context) {
                const progress = conv.request.context.media.progress;
            }
            conv.add(new Media({
                mediaType: 'MEDIA_STATUS_ACK'
            }));
            break;
        default:
            conv.add('Unknown media status received.');
    }
});Let's see it, Results!!!
At this point the entire Action can be invoked as a Test app on the Google account associated with the Action. You can immediately run it on a Google Nest Hub here like I did: