Azure Kubernetes Service add Windows Node pool


When running an Azure Kubernetes Cluster, there might come a point where you wish to add a Windows Node pool for supporting Windows containers that you may have. For adding a Windows node pool to an Azure Kubernetes Cluster, it is a requirement that the target AKS cluster is using Azure CNI for its networking configuration as a prerequisite. We will also assume that you have kubectl available to use.
Let's see how we can do this from the Azure CLI (you can find this here if needed) and then deploy a Windows container to AKS.
Create Azure CNI AKS Cluster
Login into your Azure account first:
az loginAzure CLI Login
Create a default 1 node pool/3 node cluster against an existing resource group or a new one, and define Azure CNI for the network plugin type:
az group create --name AKSRG --location eastus

az aks create -g AKSRG -n aks-test-blog --generate-ssh-keys --network-plugin azure
Azure AKS instance creation
Observe that you have an Azure CNI networked AKS Cluster from the AKS instance in the Azure portal:

By default, the nodes in this first nodepool will be using Ubuntu Linux for the OS to support Linux containers. Let's now add a Windows node pool.
Add Windows Node pool to existing AKS Cluster
Add the Windows node pool with the following command:
##set node count to 2 just for demo purposes, set this much higher for high availability and redudancy in production
az aks nodepool add -g AKSRG --cluster-name aks-test-blog --os-type Windows --name wnpool --node-count 2
Add the windows node pool to existing AKS, making sure the new node pool name is no longer than 6 characters!!
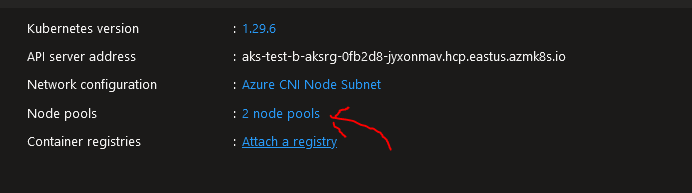
Back in the Azure Portal, observe that we now have 2 nodepools available after refreshing:
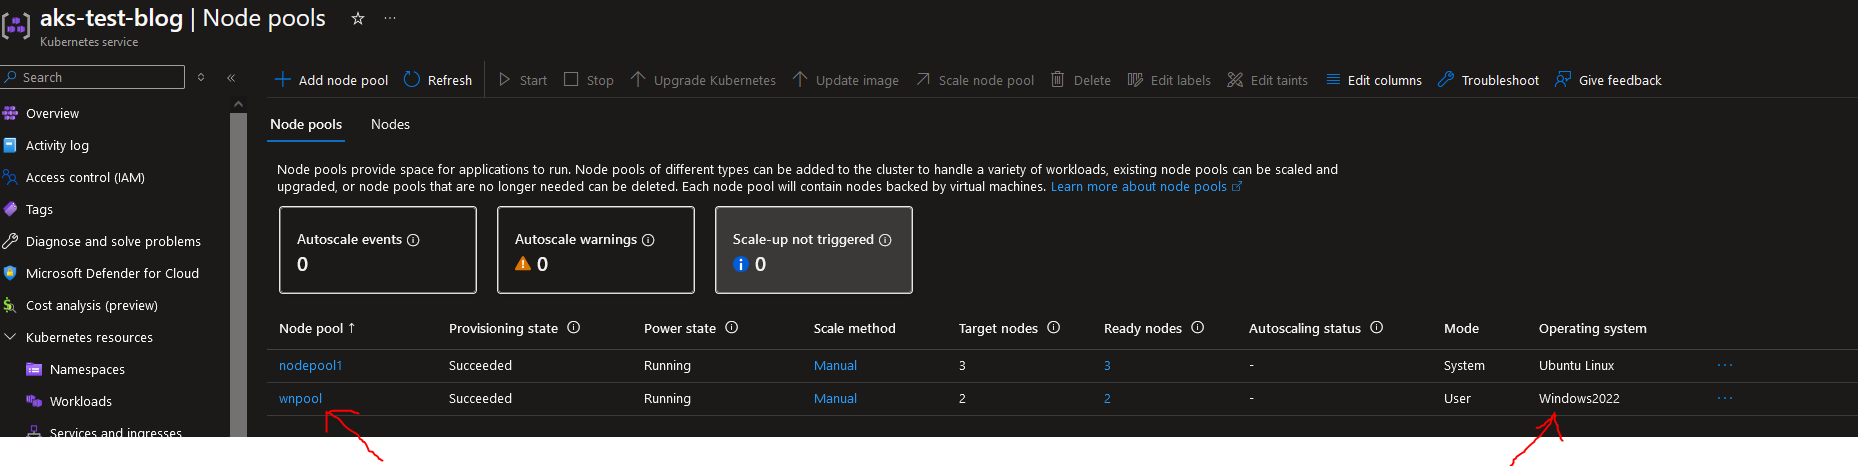
Selecting into the 2 node pools in the Azure Portal, observe the 2 separate nodepools, the first created earlier and the new Windows based pool (running Windows Server 2022) we added containing 2 nodes that we defined earlier:
Run Windows Containers in AKS
Now that we have our Windows node pool available, we can run Windows containers on the nodes. For deploying Windows containers existing in Azure Container Registry to an AKS Cluster you can 'attach' the ACR to the AKS cluster, thereby allowing/granting the AKS cluster permissions to pull from the Container Registry (in the background, there is an AcrPull role on the Managed Identity associated with the agent pool within Entra Id/AAD).
You can configure this attachment step from the Azure Portal blade, but since we are already in the context of the Azure CLI, we can can link the ACR to the AKS cluster with the following steps:
Create an Azure Container Registry with the following
az acr create --resource-group AKSRG --name aksblogtest --sku BasicCreate ACR instance
With the Azure Container Registry available, instruct the registry to directly pull a publicly available sample docker image (no need for us to pull it locally and push again, however this can take some time):
az acr import --name aksblogtest --source mcr.microsoft.com/dotnet/framework/samples:aspnetapp --image akswindows:aspnetappImport an image directly into ACR without pulling locally and pushing afterwards
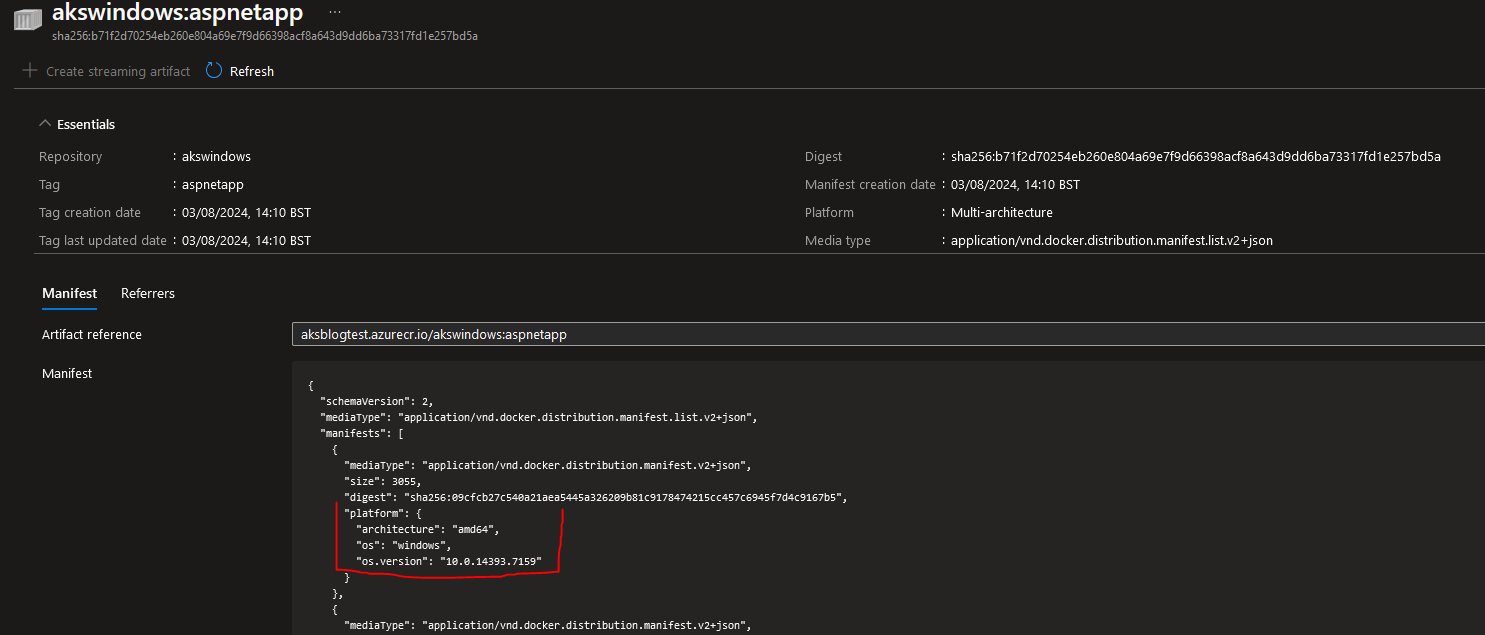
Observe that your Windows image is available in your ACR instance in the portal under Azure Container Registries > [Your_Registry]> Repositories:
Attach ACR to AKS Cluster
Now that the Azure Container Registry has an image available, attach the Azure Container Registry to the AKS cluster:
az aks update --name aks-test-blog --resource-group AKSRG --attach-acr aksblogtestNote here that aks-test-blog =(AKS Cluster) , aksblogtest = (Azure Container Registry)
You MUST execute this Container Registry attachment step. Not doing so will result in an ImagePullBackOff Status message for your pods when you attempt to create a deployment (discussed later below). It would indicate that the cluster was unable to pull the described image (in your manifest) from the registry. In summary this step creates AcrPull permissions for your AKS cluster.
After this attachment completes, confirm this attachment in the Azure portal

Next, define and get your deployment manifest YAML file to reference the image in ACR and save it to your file system. My example here has a Deployment and Service where the service will be used to expose an external IP address to view the deployed container that runs when the deployment completes:
---

apiVersion: apps/v1
kind: Deployment
metadata:
  name: testasp-deployment
  labels:
    app: testasp-deployment
spec:
  replicas: 2
  selector:
    matchLabels:
      app: testasp
  template:
    metadata:
      labels:
        app: testasp
    spec:
      nodeSelector:
        "kubernetes.io/os" : windows
      containers:
      - name: testasp
        image: <your_full_acr_image_location>
        ports:
        - containerPort: 80


---
apiVersion: v1
kind: Service
metadata:
  name: testasp-service
spec:
  selector:
    app: testasp
  ports:
    - protocol: TCP
      port: 80
      targetPort: 80
  type: LoadBalancer
YAML file defining a deployment, and a service
In your command Prompt, set the Kubernetes configuration context to your AKS cluster by getting the AKS credentials with the following command (here is my example):
az aks get-credentials -g AKSRG -n aks-test-blogGet AKS Cluster configuration to set the .kube configuration context
Now run a kubectl apply command using your YAML file to deploy your container image to the AKS cluster as like the following:
kubectl apply -f "yaml_manifest_file_path"Create deployment from YAML
After the kubectl command, the deployment may take a while. You can check progress through:
kubectl get pods -o wideGet the status of pods in your cluster
The results should show the 2 pod replicas defined in the YAML either in a status of creating or in a state of Running when complete. Notably, they should be running in the Windows nodes

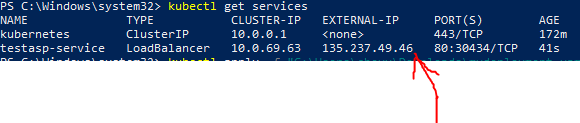
And finally to observe running services we can use the following kubectl command to view the external IP address that we can navigate to, to view our application later (whatever this might look like):
kubectl get servicesView exposed services in the cluster
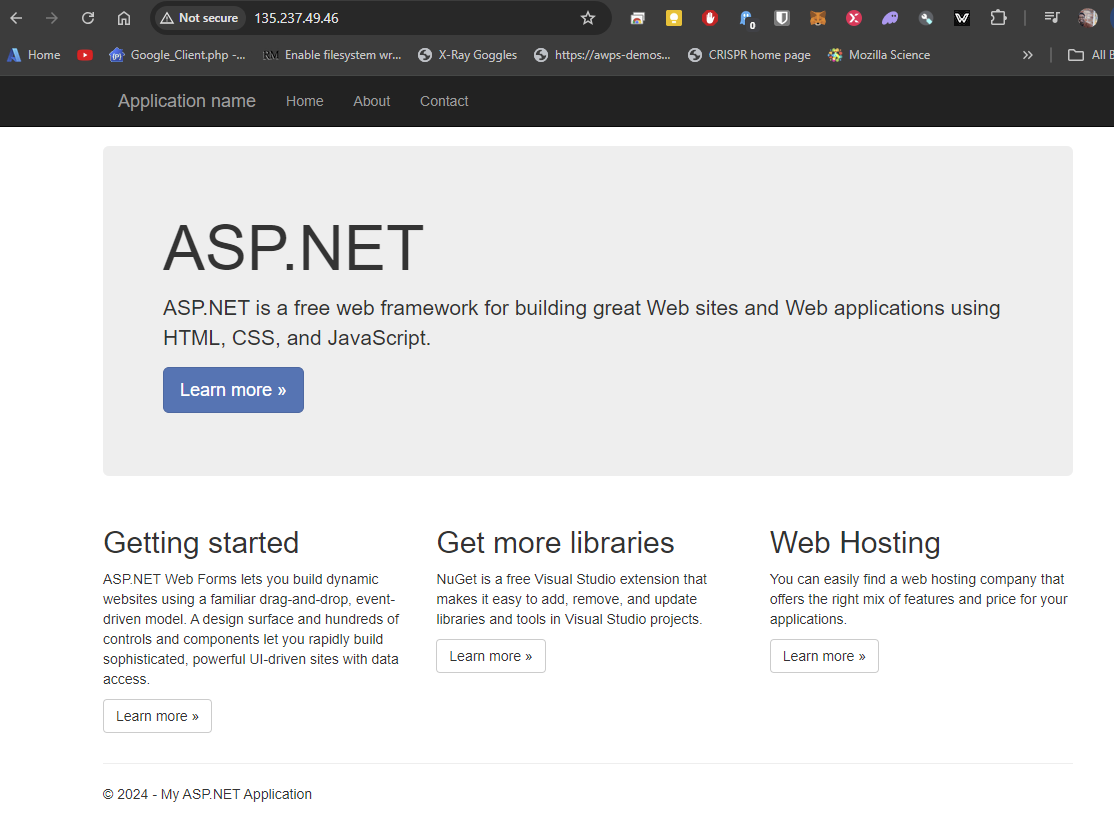
And the application looks like the following as a web app running as a Windows container on Azure Kubernetes Service within the Windows node pool:
Notes
Remember to delete unused resources .... please!!